
Turning a $5,000 cargo van into a comfortable tiny home sounds like an ambitious project, especially when you consider everything that goes into making a bare metal vehicle suitable for everyday living.
A cargo van does not come with a finished kitchen, insulated walls, comfortable sleeping space, or the conveniences that make a house feel like home. Those features have to be planned, built, and paid for individually.
The exciting part is that you do not necessarily need a brand-new vehicle or a professionally installed conversion to create a space that feels comfortable and attractive.
With a realistic budget, careful planning, and the right materials, an older cargo van can become a practical home on wheels.

The challenge is deciding where to spend your money, which upgrades genuinely improve everyday life, and which features can wait until later.
In this guide, I will walk through the major stages of a cargo van conversion, from evaluating the vehicle and planning the layout to installing insulation, flooring, electrical components, plumbing, furniture, and finishing touches.
I will also explain the expenses that are easy to overlook, the mistakes worth avoiding, and the decisions that can make a small van feel significantly more spacious.
The goal is not simply to make a van look luxurious in photographs. It is to create a space that works in real life, with enough storage, dependable utilities, comfortable sleeping arrangements, and materials that can withstand everyday use.
The prices throughout this article are general estimates for a DIY conversion, not verified receipts from a completed build.
Your costs will depend on your location, vehicle, chosen materials, equipment, and how much work you complete yourself. I have included spaces for the actual build details and expenses so the breakdown can reflect your own experience.
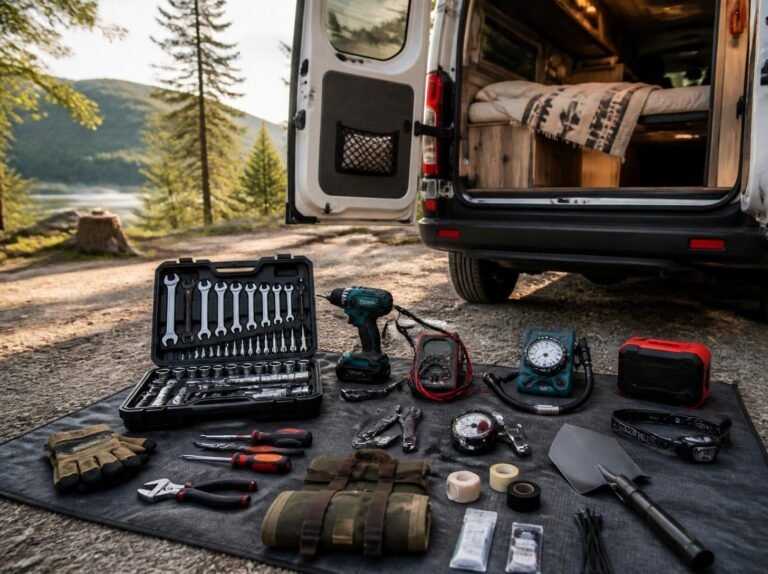
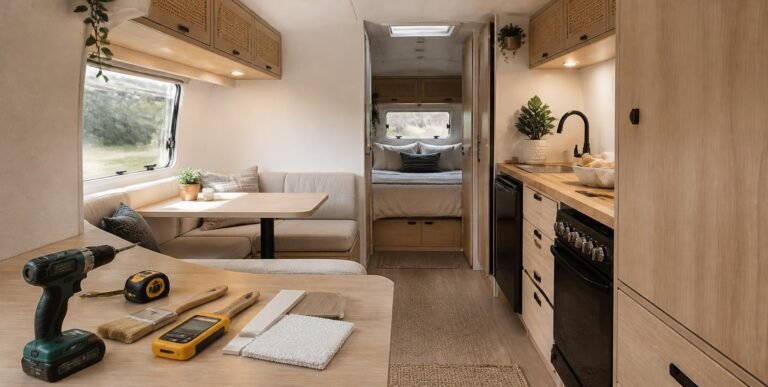
If you are preparing for your own project, my 13 must have tools for van life guide covers tools that can help with the work, while my 11 small camper renovation must haves guide covers useful materials and upgrades to consider.
The Van: What We Bought for $5,000
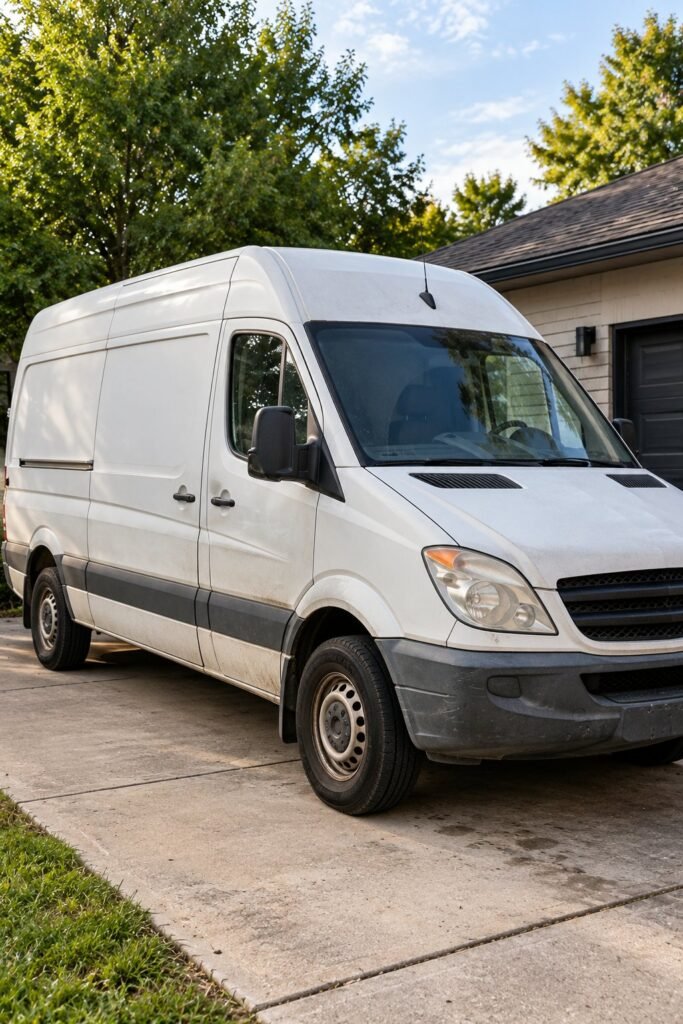
The vehicle is the foundation of the entire project. It determines how much interior space you have, how much weight you can carry, how comfortably you can travel, and how much money you may need to spend before the conversion even begins.
A $5,000 cargo van can be an attractive starting point because it leaves more room in the budget for the interior. However, a low purchase price does not automatically mean the vehicle is a bargain.
Older vans may have high mileage, worn suspension components, previous commercial use, hidden corrosion, or maintenance issues that become expensive once you start traveling.
Before purchasing a van, I would pay particular attention to the following areas.
- Engine and transmission: Check for unusual noises, warning lights, leaks, rough shifting, and signs of neglected maintenance.
- Rust and corrosion: Inspect the underside, wheel arches, door edges, floor, and seams. Structural rust deserves particular attention.
- Water leaks: Check the roof, windows, doors, and existing fittings for dampness, staining, or signs of previous water intrusion.
- Service history: Ask for maintenance records and find out whether important scheduled services have been completed.
- Tires, brakes, and suspension: These components affect safety and can add significantly to the initial cost.
- Interior dimensions: Measure the cargo area carefully. The advertised vehicle length does not tell you how much usable space remains after insulation and furniture are installed.
A pre-purchase inspection by a qualified mechanic is money well spent. It can reveal problems that are difficult for an inexperienced buyer to identify and help you decide whether to negotiate, budget for repairs, or walk away.
I would also check the vehicle’s payload rating before committing to a design. Batteries, water tanks, timber, cabinets, appliances, passengers, and personal belongings all add weight. A van that looks spacious enough for a luxury build may have less remaining payload than you expect.
The biggest lesson here is simple: choose a van that is mechanically sound enough to justify the conversion. Beautiful cabinetry and expensive appliances cannot compensate for a vehicle that constantly needs repairs.
Our Total Cost at a Glance
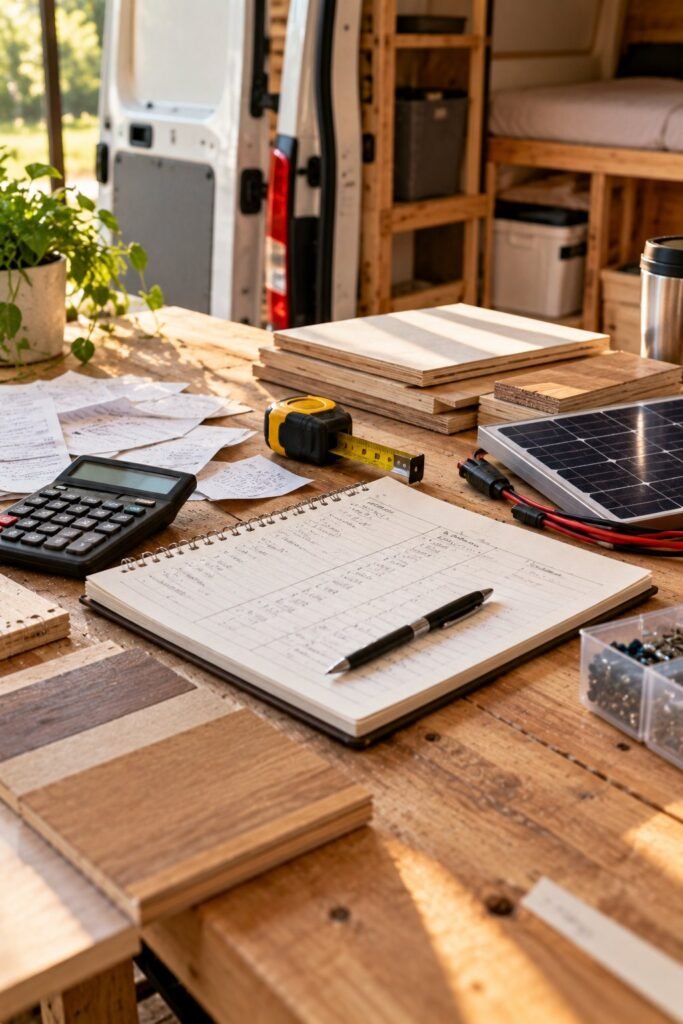
Before buying materials, establish a realistic budget for the entire project. It is easy to focus on the visible upgrades, such as wooden walls, attractive lighting, and a comfortable mattress, while overlooking the systems hidden underneath them.
Electrical equipment, repairs, insulation, ventilation, fasteners, sealants, tools, and unexpected replacements can consume a large part of the budget. Even small purchases add up when you are working through an entire vehicle.
The following table provides a starting point for budgeting a mid-level DIY conversion. These figures are illustrative estimates in US dollars, not a quote or a record of our actual expenses.
| Category | Typical Range | Our Actual Cost |
|---|---|---|
| Van purchase | $5,000 | [ADD] |
| Repairs and maintenance | $300 to $2,000+ | [ADD] |
| Sound deadening and insulation | $300 to $900 | [ADD] |
| Flooring | $150 to $500 | [ADD] |
| Walls and ceiling | $300 to $900 | [ADD] |
| Electrical system | $1,500 to $5,000+ | [ADD] |
| Plumbing and water | $200 to $700 | [ADD] |
| Heating and ventilation | $300 to $1,500 | [ADD] |
| Cabinetry and bed | $500 to $2,500 | [ADD] |
| Mattress and soft goods | $250 to $1,000 | [ADD] |
| Lighting and extras | $100 to $500 | [ADD] |
| Total | $8,800 to $20,500+ | [ADD] |
The estimated total includes the $5,000 purchase price and the listed conversion categories. It does not necessarily include every possible expense, such as insurance changes, registration, professional labor, major mechanical repairs, or every tool you might need to buy.
For example, the lower end of the budget assumes you make relatively economical choices, complete much of the work yourself, and avoid major mechanical problems. The upper end allows for more expensive equipment and materials, but a premium conversion can cost considerably more.
I recommend keeping a separate contingency fund rather than spending every available dollar on the initial shopping list. Setting aside approximately 10% to 20% of your planned project budget can help absorb unexpected costs, although older vehicles with uncertain maintenance histories may require a larger reserve.
Another useful approach is to divide the budget into three categories:
- Essential systems: Mechanical repairs, safe electrical installation, ventilation, insulation, and basic sleeping arrangements.
- Everyday comfort: A functional kitchen, useful storage, reliable lighting, and practical water facilities.
- Luxury upgrades: Premium finishes, upgraded appliances, decorative features, and additional convenience items.
This makes it easier to identify where you can save money without compromising safety or comfort.
Step 1: Plan the Layout Before You Cut Anything
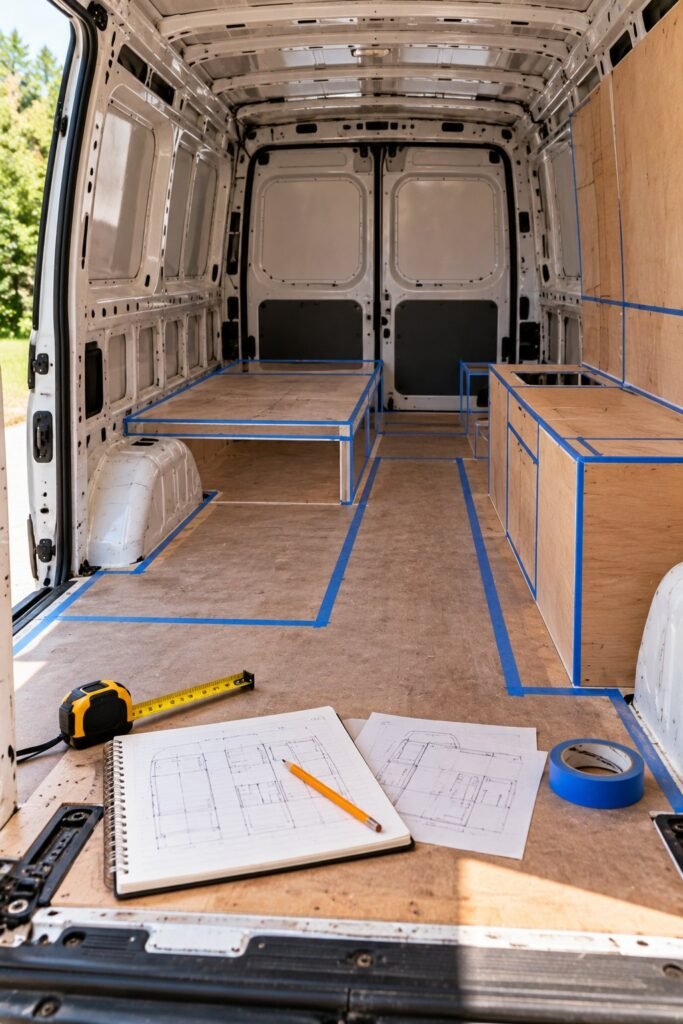
The layout determines how comfortable your van will feel long after the renovation is finished. A beautiful interior can still be frustrating to use if you cannot move around easily, access your belongings, or prepare a meal without moving half the furniture.
Before buying materials, think about how you expect to use the van. A vehicle designed for occasional weekend camping has different requirements from one intended for extended travel or full-time living.
Start by answering a few practical questions.
- How many people will sleep in the van?
- Will the bed remain permanently assembled, or should it convert into a seating area?
- Do you need an indoor kitchen, a refrigerator, or a dedicated cooking surface?
- How much fresh water will you carry?
- Will you need space for outdoor equipment, clothing, work supplies, or pets?
- Do you need room to sit comfortably during bad weather?
- Where will the electrical equipment, water containers, and heavier items go?
Once you have a rough plan, measure the available interior space and mark the proposed furniture locations using masking tape. Include the thickness of insulation, wall panels, and flooring because these reduce the usable dimensions.
I would also check door openings, sliding door access, headroom, and the clearance needed to open drawers and cabinet doors. A cabinet may fit perfectly on paper but become awkward when a refrigerator door or storage compartment blocks the walkway.
Weight distribution matters as much as the layout. Heavy batteries, water tanks, and other equipment should be positioned with the vehicle manufacturer’s axle and loading limits in mind. Avoid concentrating too much weight at the rear or on one side.
Typical mistake: Designing around furniture rather than daily routines.
It is tempting to start with the bed or kitchen you want and squeeze everything else around it. A better approach is to plan the movement between essential areas first, then fit the furniture around those routes.
Step 2: Inspect, Strip, and Treat Rust
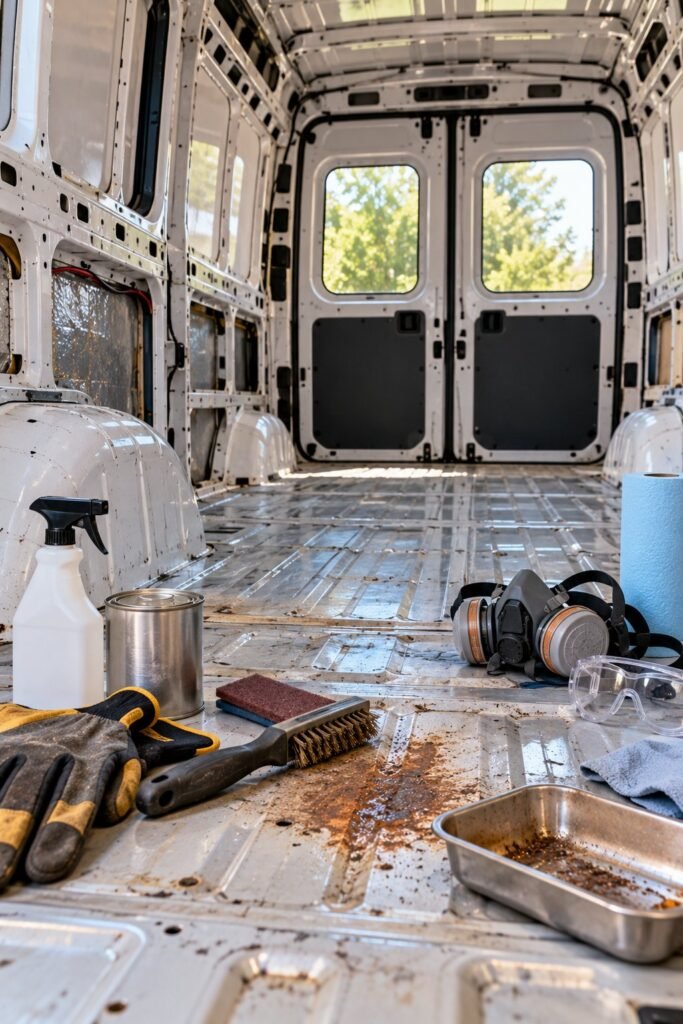
Once the layout is planned, the next step is to prepare the vehicle’s interior. This stage is not especially glamorous, but it can prevent problems that would otherwise be difficult and expensive to fix later.
Remove unnecessary existing paneling, damaged flooring, and old fittings that will not be part of the new design. Work carefully around factory wiring, airbags, sensors, and other vehicle components. Do not cut into areas until you understand what is behind them.
With the cargo area exposed, inspect the metal floor, sidewalls, roof, seams, and corners. Look for corrosion, holes, old sealant, and evidence of water entering through the roof or doors.
If you discover a leak, identify and repair its source before installing insulation or wall coverings. Covering damp metal can trap moisture and encourage corrosion, mold, or damage to the new materials.
Minor surface rust may be manageable with appropriate preparation and a compatible rust treatment or primer.
More serious corrosion, especially around structural components, should be assessed by a qualified repair professional. Avoid treating significant structural rust as a simple cosmetic problem.
After cleaning and repairing the interior, allow surfaces to dry thoroughly. Check the condition of existing wiring and remove debris that could interfere with the installation of the new floor and insulation.
Typical cost: Basic cleaning supplies, sealants, and minor rust treatments may cost relatively little. Extensive bodywork or structural repairs can increase the budget substantially.
Practical tip: Photograph the bare interior before covering it. These photographs can help you remember where structural supports, wiring routes, and mounting points are located.
Step 3: Sound Deadening and Insulation
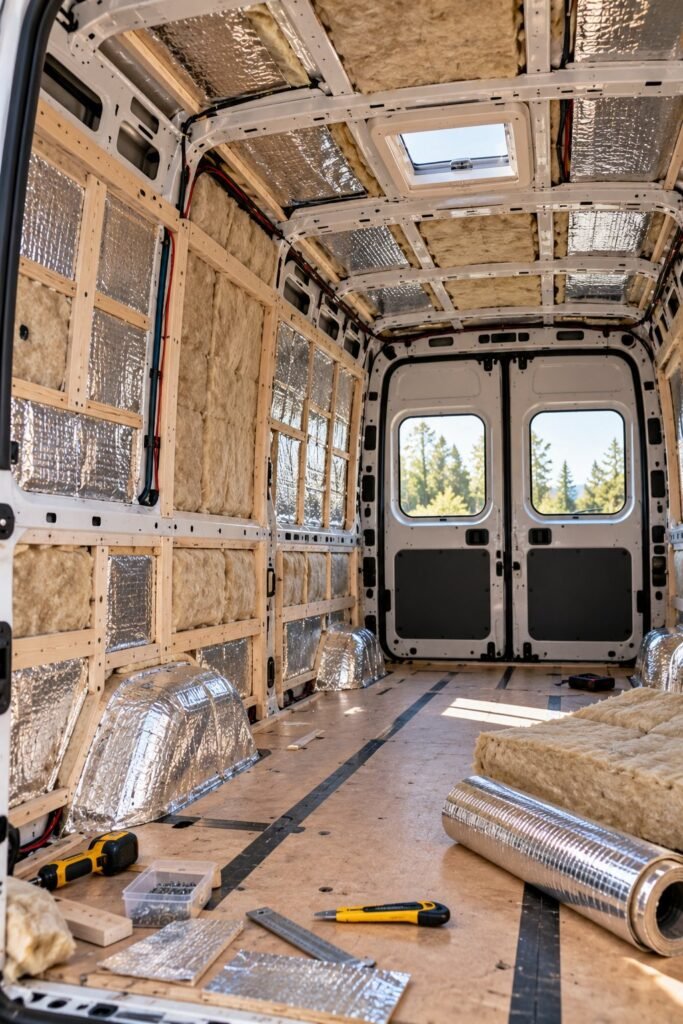
A cargo van’s metal shell offers little protection from outdoor temperatures and road noise on its own. Insulation helps make the interior more comfortable, while sound deadening can reduce certain vibrations and rattles.
These are related but different jobs. Sound-deadening materials generally help reduce panel vibration, while thermal insulation slows the transfer of heat. Neither completely eliminates outside noise or temperature changes.
Common insulation options include rigid foam boards, mineral wool, polyester insulation, and specialist products designed for vehicle conversions.
Each has advantages and disadvantages involving cost, installation, moisture behavior, and the ability to fit around curved surfaces.
Before choosing a product, consider the following:
- Thermal performance: Look at the product’s published insulation performance and whether it suits your intended climate.
- Moisture management: Condensation can form when warm, humid interior air contacts cold metal. Avoid trapping moisture against the van’s body.
- Installation quality: Gaps, compressed insulation, and poorly fitted sections can reduce performance.
- Weight and thickness: Thick insulation reduces the available living space, while heavy materials reduce payload.
- Material compatibility: Adhesives and insulation should be appropriate for vehicle temperatures, vibration, and the surfaces involved.
Pay particular attention to metal ribs, corners, and areas around windows. These can become thermal bridges, allowing heat to move through the structure more easily than through the insulated sections.
Ventilation is equally important. Insulation alone does not prevent condensation from cooking, breathing, wet clothing, or showering. A properly designed ventilation system helps remove humid air before moisture accumulates.
For additional ideas about managing wet conditions, my 11 easy hacks for camping in the rain guide covers practical ways to stay more comfortable when the weather turns unpleasant.
Typical cost: Around $300 to $900 for sound deadening and insulation in a mid-level DIY build, depending on vehicle size and product selection.
Step 4: Subfloor and Flooring
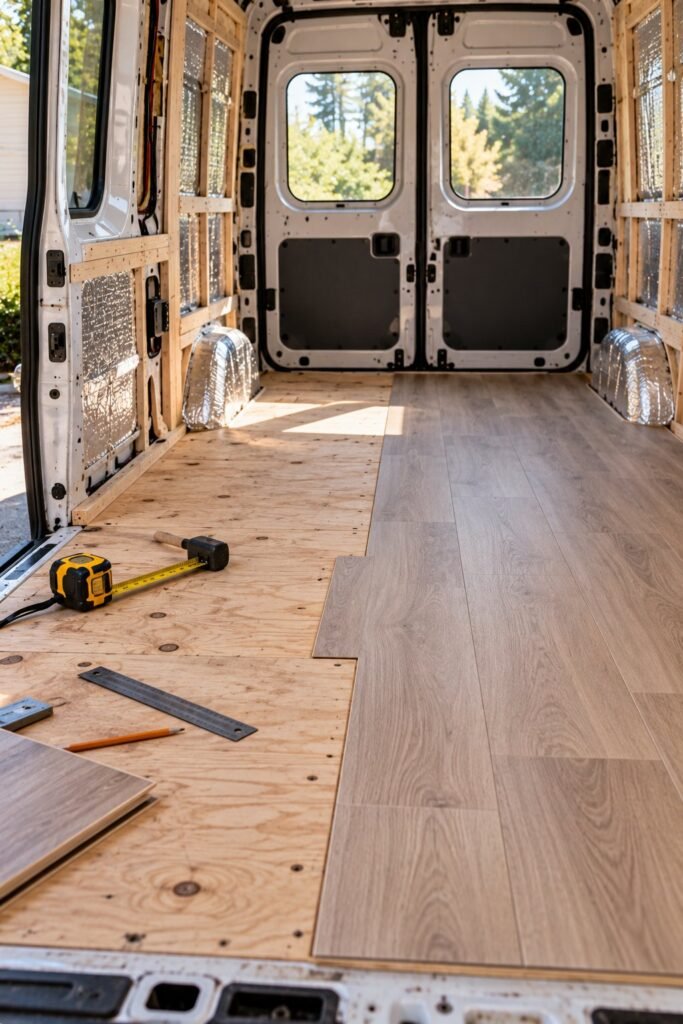
The floor has to handle muddy shoes, spilled drinks, temperature changes, movement, and the occasional heavy object being dragged across it. It also needs to be secure enough that it does not shift or create uncomfortable uneven spots.
A common approach is to install a suitable subfloor over a properly prepared base, with compatible insulation where appropriate, and then add a durable finished surface.
Plywood is often used for the subfloor because it can provide a stable base when selected and installed correctly.
Vinyl flooring is another popular option because it is relatively easy to clean and comes in a variety of finishes. Other suitable materials may work depending on the vehicle, intended use, and installation requirements.
Before laying the floor, make sure the metal underneath is clean, dry, and free from unresolved rust or leaks. Plan for access to any components that may require inspection or maintenance later.
Keep the following details in mind:
- Measure the floor carefully before cutting the material.
- Follow the flooring manufacturer’s guidance for installation and expansion.
- Avoid blocking factory drain points or access panels.
- Use appropriate fastening methods that do not damage hidden vehicle systems.
- Consider the combined weight of the subfloor, insulation, and finished flooring.
- Check that the final floor height does not interfere with door operation or other fittings.
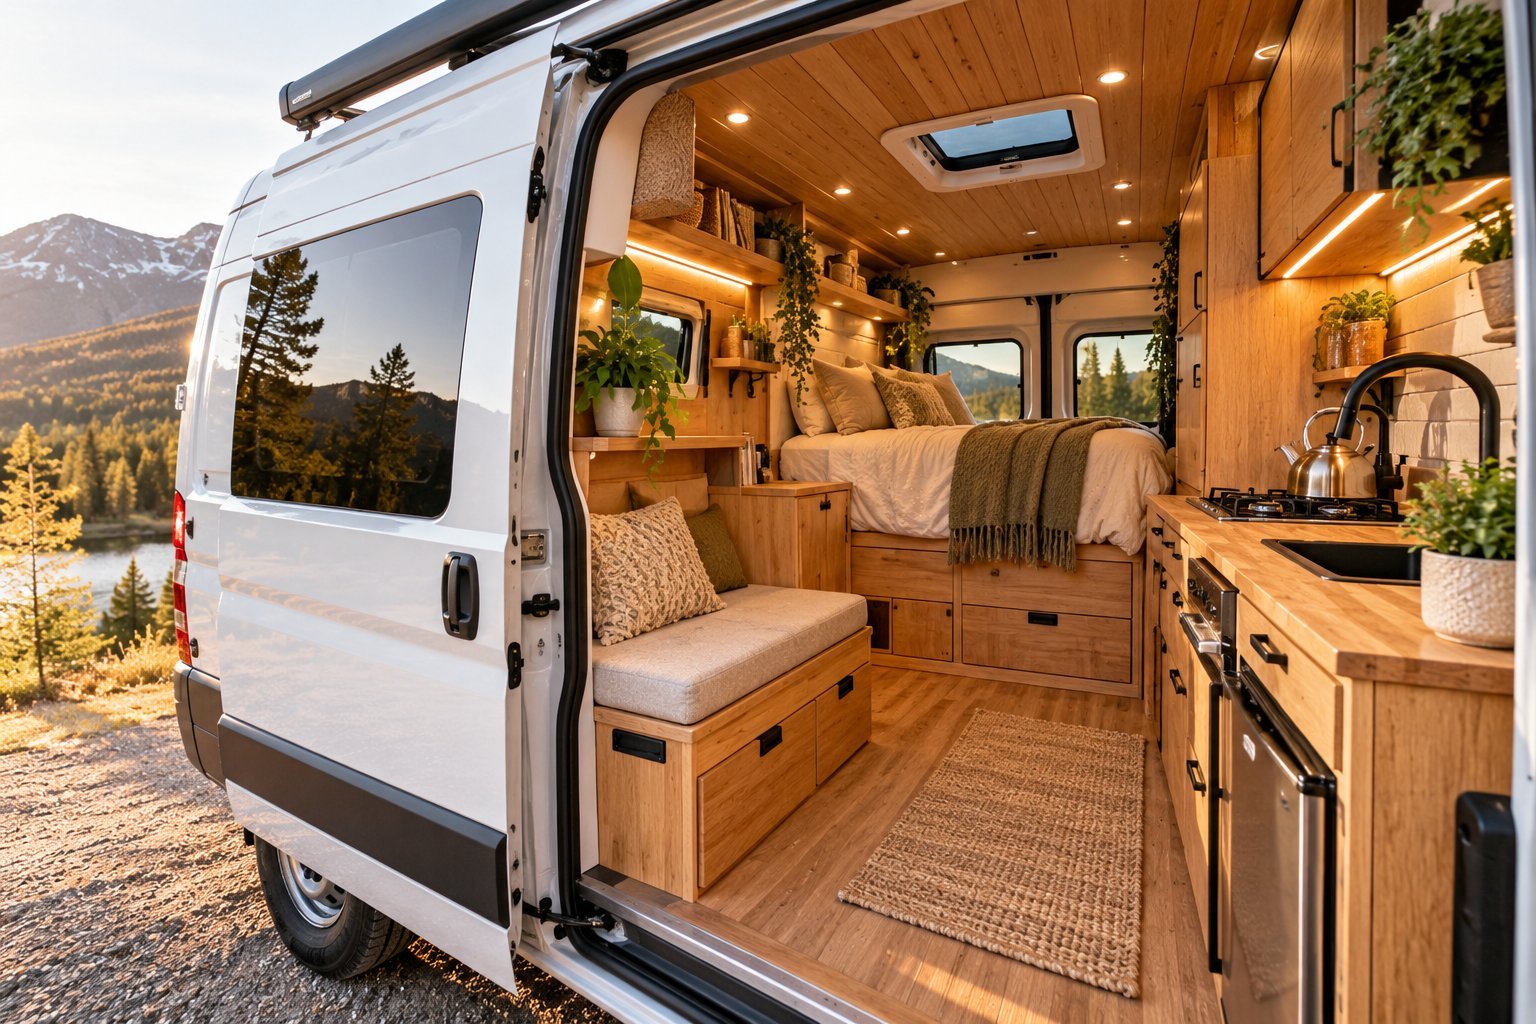
A light wood-effect finish can help create a warm, residential appearance without requiring heavy hardwood flooring. Pairing it with neutral walls and simple cabinetry can also make a small interior feel more cohesive.
Typical cost: Approximately $150 to $500, depending on the subfloor, insulation, finish, and tools required.
Practical tip: Keep a few spare pieces of your finished flooring if possible. They may come in handy if you need to repair a damaged section later.
Step 5: Walls and Ceiling
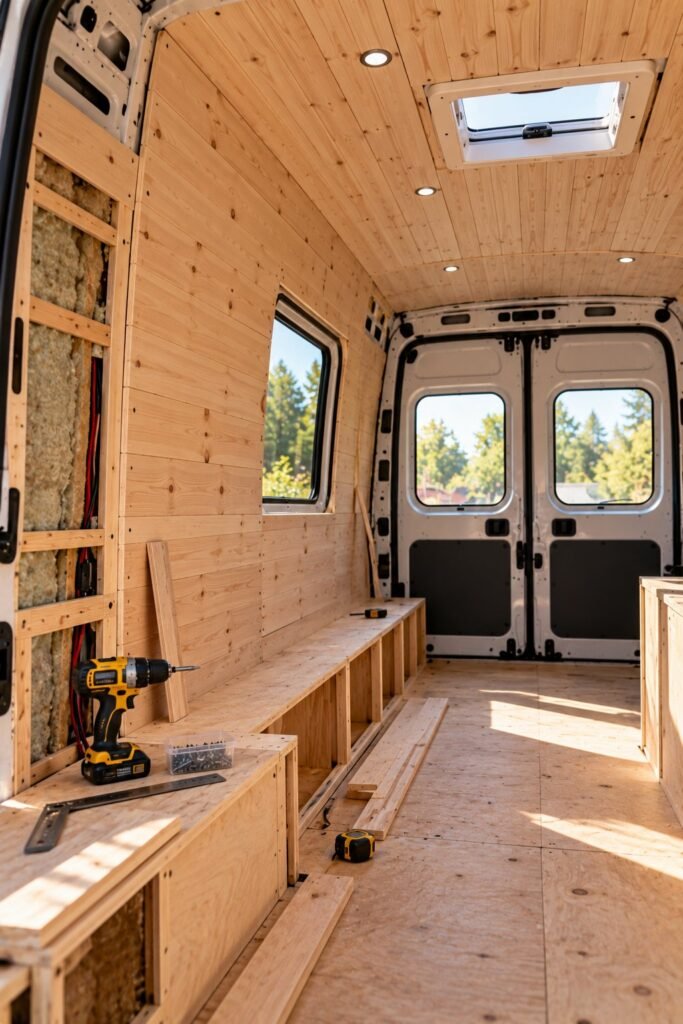
The walls and ceiling have a major influence on how luxurious a converted van feels. They hide insulation and wiring, provide mounting surfaces, and establish the visual style of the interior.
Wood paneling is popular because it adds warmth and creates a home-like appearance. Plywood can provide a clean, simple finish, while lightweight decorative panels may help reduce overall weight. The right choice depends on your budget, design preferences, and installation skills.
Before covering the walls, plan where electrical cables, lighting, switches, ventilation equipment, and cabinet supports will go. Photograph the wiring routes and take measurements from fixed reference points. This information becomes valuable when you later need to mount a shelf or repair an electrical component.
Use suitable mounting points and fasteners designed for the intended loads. Decorative wall panels should not be treated as structural supports unless the installation has been designed for that purpose.
Light-colored walls can help reflect natural light and make a compact interior feel brighter. If you prefer darker finishes, consider balancing them with a roof vent, windows, lighter bedding, or carefully placed lighting.
I would also prioritize materials that are easy to wipe clean. A van’s interior experiences more vibration, temperature variation, and movement than a typical room in a house, so finishes need to be practical as well as attractive.
Typical cost: Around $300 to $900 for a basic DIY wall and ceiling finish, with premium materials potentially costing more.
Step 6: The Electrical System
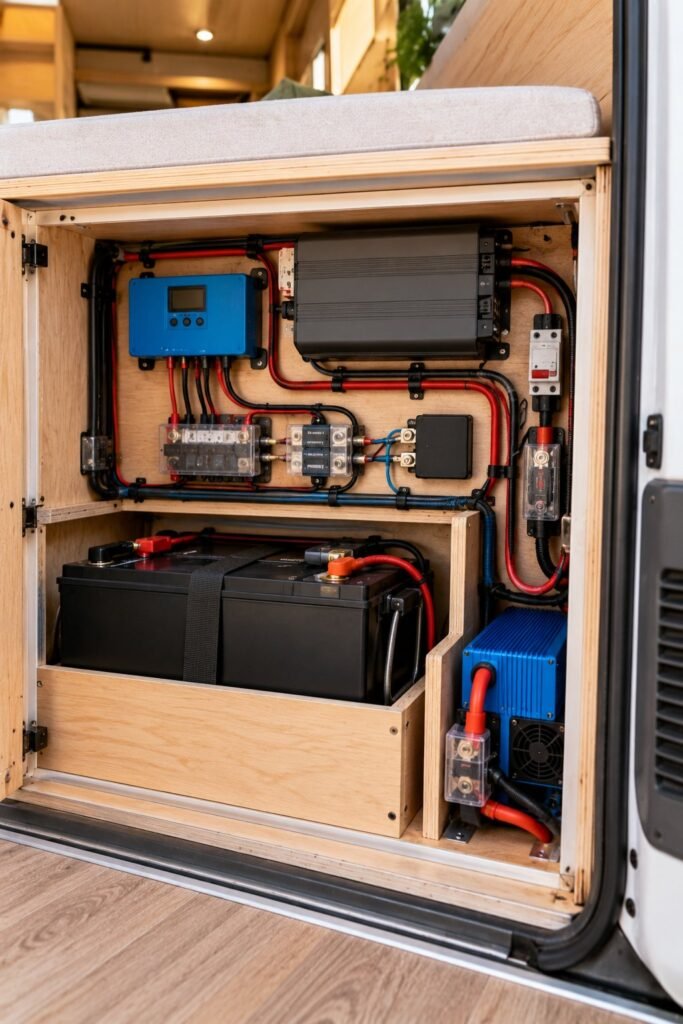
Electricity is one of the most important parts of a comfortable van conversion. It allows you to charge phones and laptops, run lights, operate selected appliances, and potentially power a refrigerator or other equipment without relying entirely on campsite hookups.
It is also one of the areas where poor planning can create serious safety problems.
Start by estimating your daily energy use. Write down the appliances you expect to operate, their power consumption, and the number of hours you will use them.
A small light used for several hours consumes far less energy than a high-powered appliance running for a long period.
Your setup might include:
- A deep-cycle battery bank, potentially using lithium iron phosphate batteries.
- Solar panels and a suitable solar charge controller.
- A DC-to-DC charger that allows compatible charging from the vehicle’s alternator.
- An inverter if you need household-style AC power.
- Appropriately rated wiring, fuses, circuit protection, and disconnects.
- Battery monitoring and suitable ventilation or temperature controls where required.
The correct system depends on the appliances, battery chemistry, expected energy consumption, charging opportunities, and manufacturer’s specifications. Solar panels alone do not guarantee a reliable power supply, particularly during cloudy weather or when the van is parked in shade.
Plan your installation before buying components. An oversized battery may be unnecessary if you mainly charge small devices, while a small battery can become frustrating if you expect to operate a refrigerator, computer, cooking appliances, and other equipment regularly.
Electrical safety deserves particular attention. Incorrect wire sizing, inadequate overcurrent protection, loose connections, or poorly installed high-current equipment can cause overheating and fires.
Have a qualified professional design, install, or review the system if you lack the necessary experience. Follow the equipment manufacturers’ requirements and applicable electrical standards.
For ideas about useful devices for a compact camping setup, my 5 must have camper gadgets guide covers equipment worth considering.
Typical cost: Approximately $1,500 to $5,000 or more for a substantial DIY system, depending on battery capacity, solar equipment, inverter requirements, and installation.
Step 7: Plumbing and Water
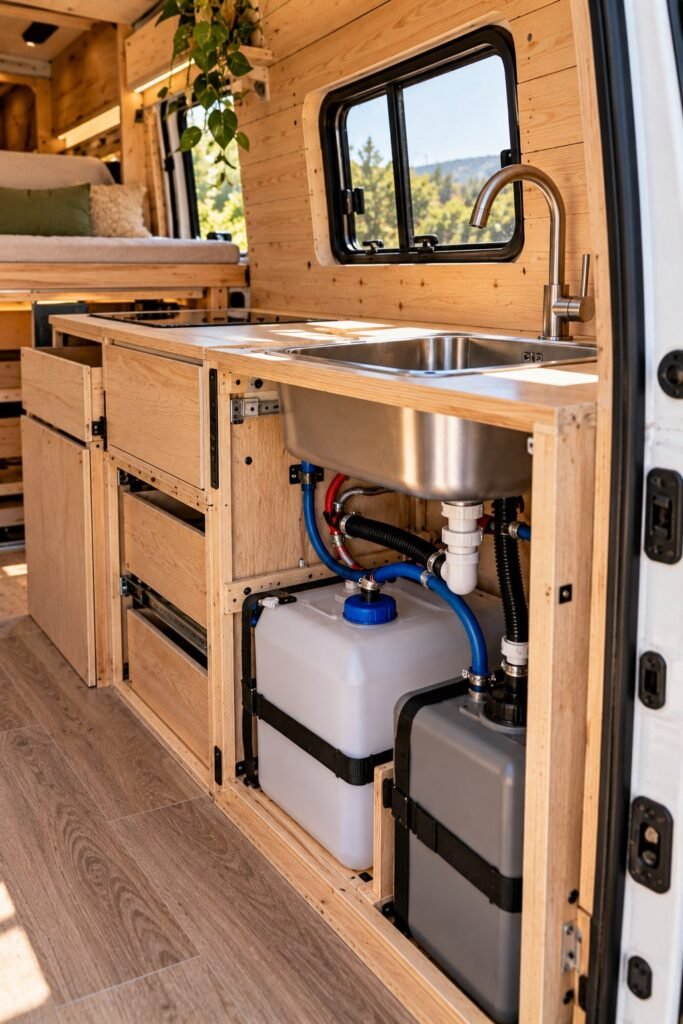
A functional water system can make van life considerably more comfortable. Even a simple sink can make cooking, washing dishes, and maintaining everyday hygiene easier.
The most basic arrangement may involve a clean water container, a manual or electric pump, and a separate container for wastewater. More elaborate systems can include a fixed freshwater tank, plumbing lines, a pressurized pump, a sink, a water heater, and a shower.
The best choice depends on how often you travel, how much water you use, and whether you have access to refill points.
A larger water tank can reduce the frequency of refills, but water is heavy. One liter weighs approximately one kilogram, so a 50-liter tank adds about 50 kilograms before accounting for the tank, fittings, and associated equipment.
When planning the system, consider:
- Easy access for cleaning and maintenance.
- Secure mounting for tanks and containers.
- Protection against leaks and water damage.
- Safe separation of drinking water from wastewater.
- Adequate drainage and access to legal wastewater disposal.
- Protection against freezing if you travel in cold conditions.
If you want hot water, compare the cost and complexity of the available options before committing to a permanent installation. A full shower system can be convenient, but it also consumes space and water while adding plumbing and maintenance requirements.
For many people, a compact sink and a practical outdoor washing arrangement provide enough convenience without taking up the room required by a permanent indoor shower.
Typical cost: Around $200 to $700 for a modest system, with water heaters, showers, and larger tanks increasing the total.
Step 8: Heating, Cooling, and Ventilation
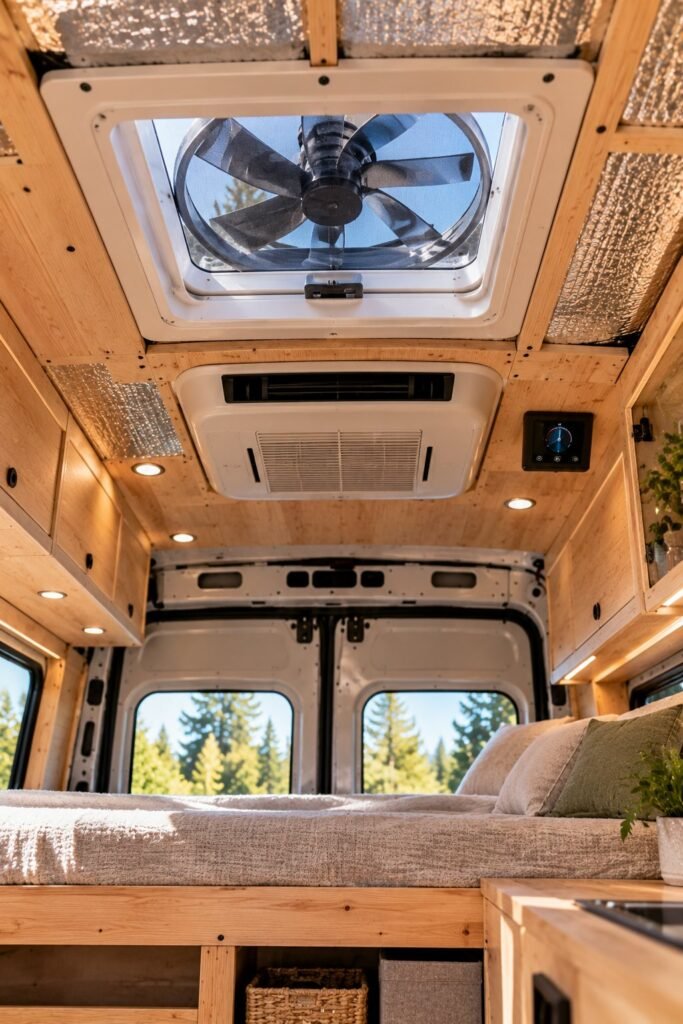
Temperature control can make the difference between a van that looks beautiful and one that is genuinely comfortable to live in.
A roof ventilation fan is often a valuable upgrade because it helps remove hot air, cooking odors, and moisture. When used with an appropriate air intake, it can improve airflow through the interior.
Window coverings can help reduce unwanted heat and improve privacy, although they do not replace ventilation.
For heating, some builders use purpose-designed diesel heaters, appropriately installed fuel-burning systems, or electric heating when connected to a suitable external power supply.
The correct option depends on your climate, available energy, installation requirements, and intended use.
Any fuel-burning heater must be suitable for the installation and vented according to the manufacturer’s instructions. Exhaust leaks can introduce carbon monoxide, which is dangerous and potentially fatal.
Install and maintain an appropriate carbon monoxide alarm, and never use an outdoor cooking stove or an unvented fuel-burning appliance as an indoor heater.
Cooling can be more challenging. Fans improve airflow but cannot always reduce the temperature below the surrounding air. Air conditioning can help in hot climates, although it may require substantial electrical capacity or a reliable external power connection.
When planning ventilation and climate control, think about the conditions you will actually encounter. A setup designed for mild spring weather may not be adequate for humid summers or freezing winter nights.
My 11 gadgets every RVer should own guide covers useful RV equipment, including safety devices worth considering.
Typical cost: Approximately $300 to $1,500 or more for selected heating and ventilation upgrades. Air conditioning and its associated power requirements can increase the budget significantly.
Step 9: Cabinetry, Bed, and Furniture
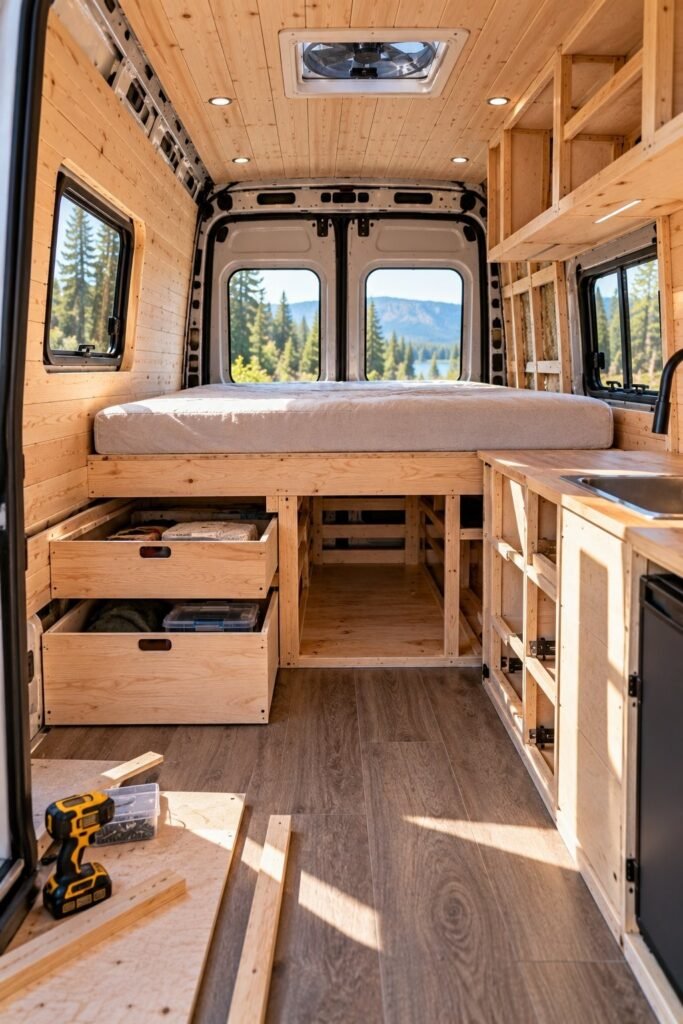
Furniture is where the conversion begins to feel like a living space rather than a work vehicle. It also determines how efficiently you use every available inch.
A raised bed with storage underneath is a common solution because it combines two functions in the same footprint. Depending on the design, the space underneath can hold clothing, camping equipment, folding chairs, tools, or other belongings.
A compact kitchen counter can provide enough room for food preparation without occupying the entire side of the van. Drawers and cabinets should be sized around the items you intend to store rather than around arbitrary measurements.
Lightweight plywood is often useful for DIY cabinetry, but the thickness, support structure, and fasteners need to be appropriate for the loads. Avoid adding unnecessary weight simply to make the furniture look substantial.
Road vibration also changes how furniture should be built. Secure cabinets and heavy equipment to suitable structural mounting points, use reliable latches, and make sure drawers cannot slide open unexpectedly while driving.
Before permanently installing the furniture, test how you will use it. Can you reach your clothes without climbing over the bed? Can you open the refrigerator without blocking the walkway? Is there enough space to sit comfortably and change clothes?
Storage works best when frequently used items are easy to reach and rarely used equipment is stored out of the way. Overhead cabinets can help, but they should not make the interior feel cramped or create hazards for occupants.
For more ideas, my 5 easy RV organization accessories and hacks guide covers practical ways to keep a compact living area organized.
Typical cost: Around $500 to $2,500 for a bed platform, cabinetry, and basic furniture, depending on materials and complexity.
Step 10: The Luxury Touches
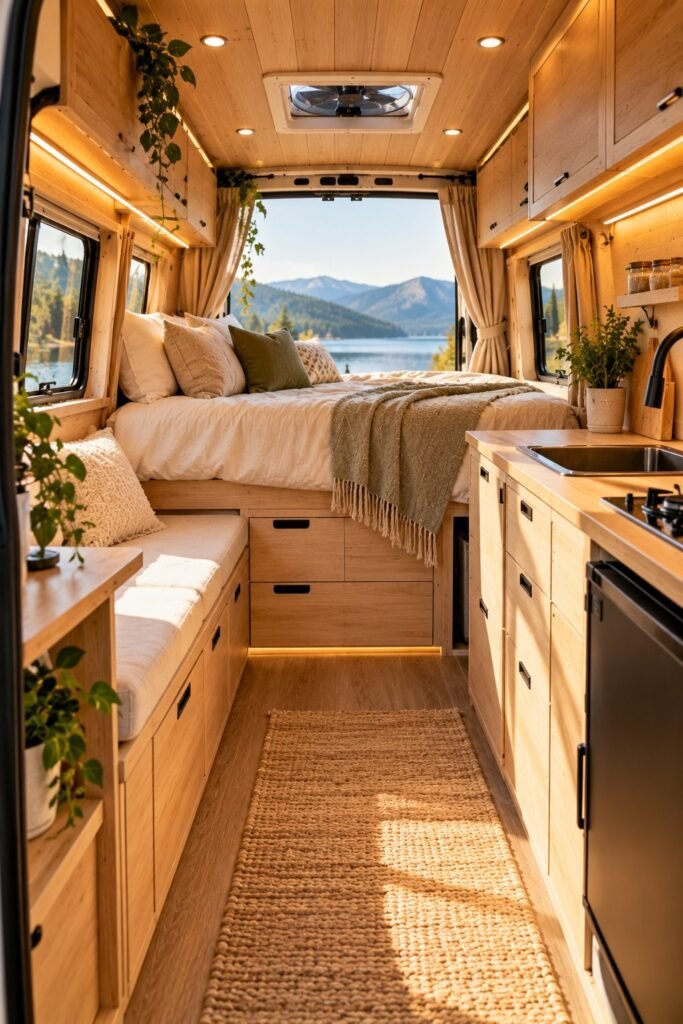
Luxury in a tiny home does not have to mean expensive marble surfaces, oversized appliances, or designer furniture. In a small van, luxury is often about removing the everyday inconveniences that make a space feel temporary.
A comfortable mattress is a good example. If you spend several nights in the van each week, proper support and enough sleeping space can be more valuable than decorative upgrades that you rarely use.
Lighting is another detail that can dramatically change the atmosphere. Combining practical task lighting with warm ambient lights can make the interior feel inviting in the evening.
Dimmable lights also allow you to adjust the brightness without relying on a single harsh overhead fixture.
Other features worth considering include:
- Curtains or window coverings for privacy and light control.
- Soft bedding that is easy to wash and store.
- A compact refrigerator that suits your power budget.
- A useful kitchen surface with room for food preparation.
- Hooks, shelves, and compartments that keep everyday items accessible.
- Cushions and upholstery that can withstand frequent use.
- A small amount of personal decoration that does not clutter the space.
The key is to distinguish between features that look good and features that improve your routine. A decorative shelf might look attractive, but a well-positioned storage compartment could save you time every morning.
I would also avoid purchasing every accessory before you have used the van. Living in the finished space for a while can reveal what you actually need. You may discover that a simple storage basket solves a problem more effectively than a custom cabinet.
Typical cost: Approximately $250 to $1,000 or more, depending on the mattress, furnishings, lighting, and selected upgrades.
Legal, Weight, and Insurance Considerations

Before considering the conversion complete, check the legal and practical requirements that apply to your vehicle and intended use.
Registration rules vary by jurisdiction. Some authorities distinguish between ordinary cargo vehicles and converted campervans, while others have specific requirements for vehicle classification or inspection.
Do not assume that installing a bed and kitchen automatically changes the vehicle’s official status.
Insurance is another important consideration. A standard commercial vehicle policy may not cover custom cabinetry, permanently installed electrical equipment, personal belongings, or the intended use of a converted van.
Contact your insurer before making major modifications and explain the proposed conversion in detail.
Weight deserves ongoing attention. Your van’s gross vehicle weight rating and axle limits still apply after the interior has been installed. The total includes the conversion, passengers, fuel, water, food, luggage, and equipment.
If possible, weigh the completed vehicle and compare the results with the manufacturer’s ratings. An overloaded van can affect braking, handling, tire performance, and overall safety.
Also consider the following before traveling:
- Confirm that modifications comply with applicable vehicle safety rules.
- Check whether any electrical, gas, or structural work requires inspection.
- Keep receipts, manuals, and installation records for major components.
- Confirm that your insurance covers the actual vehicle configuration.
- Research overnight parking rules, campsite restrictions, and local ordinances.
- Plan where you will dispose of wastewater and household rubbish.
- Carry appropriate emergency and fire-safety equipment.
A conversion that looks finished is not necessarily ready for the road. Complete a thorough inspection of the vehicle, secure every cabinet and appliance, and check that doors, seat belts, lights, and other original vehicle safety features operate correctly.
What We’d Do Differently
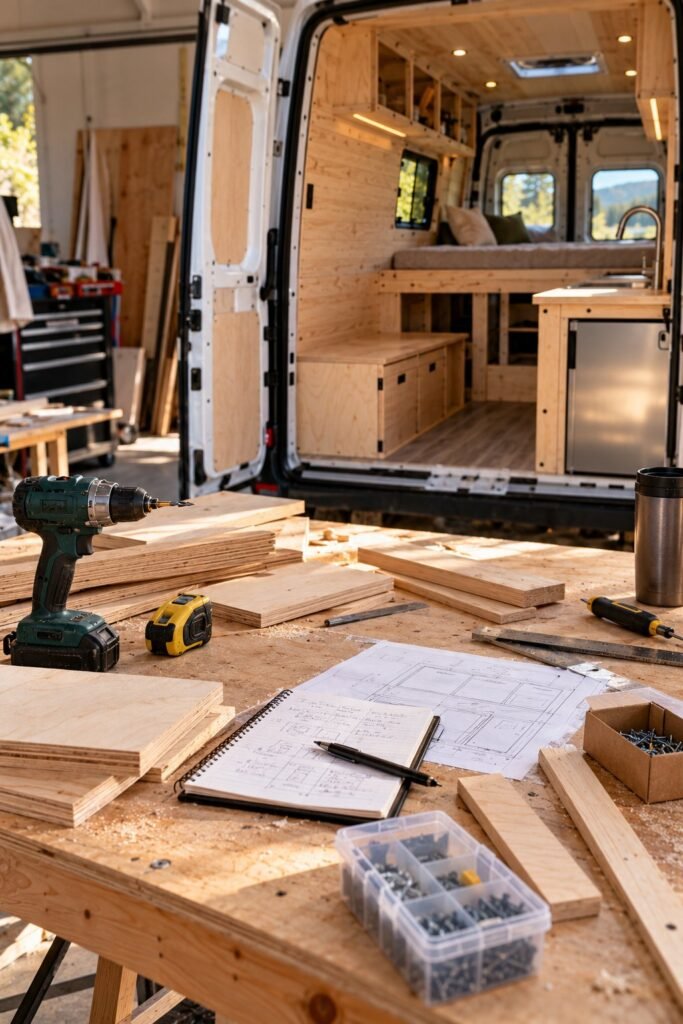
Looking back on a major DIY project is useful because the decisions that seem sensible at the beginning do not always work as expected once you start using the finished space.
One area worth reviewing is the original budget. It is easy to underestimate the number of small supplies required, from screws and brackets to adhesives, protective equipment, and replacement tools.
Keeping a running expense list makes it easier to see where the money is going before the budget gets out of control.
Another lesson is to avoid rushing the hidden parts of the build. It can be tempting to install the visible wall panels and cabinets as quickly as possible, but doing so before checking the wiring, insulation, and water systems can create unnecessary rework.
I would also pay attention to how the van feels in everyday use rather than judging the project only by its appearance. A beautiful kitchen is less useful if there is nowhere to put groceries.
A large bed may be comfortable but leave too little room for storage. Every design choice involves a trade-off.
Here are a few lessons worth considering during your own build:
Plan the entire system before buying individual components. The battery, appliances, charging equipment, and wiring must work together. The same principle applies to water tanks, pumps, sinks, and drainage.
Measure more than once. Small measurement errors become expensive when they affect several adjoining cabinets or wall panels.
Prioritize ventilation. Moisture can damage materials and make the interior uncomfortable. Good airflow should be part of the design from the beginning.
Avoid buying tools for only one task unless necessary. Borrowing or renting specialist tools may be more economical than purchasing equipment you will rarely use.
Leave access to important components. Electrical connections, plumbing fittings, fuses, and maintenance points should not be permanently buried behind inaccessible furniture.
Test the layout before making permanent changes. Temporary cardboard templates and taped floor plans can reveal problems before you spend money on materials.
Was It Worth It?

Turning a cargo van into a tiny home can be rewarding, but the value of the project depends on more than the final photographs.
A DIY conversion gives you control over the layout, materials, and features. You can prioritize the things that matter most to you instead of paying for a professionally designed package that may not match your needs.
Completing the work yourself can also help you understand the systems you will eventually need to maintain.
However, DIY does not automatically mean cheap. Mistakes, specialist tools, unexpected vehicle repairs, and upgraded equipment can push the cost higher than planned.
The hours spent researching, measuring, building, and troubleshooting also represent a real commitment.
Compare the total project cost with the price of a professionally converted van that offers similar mechanical condition, interior space, electrical capacity, and facilities.
Include the original vehicle, repairs, conversion materials, professional work, and finishing touches in your calculation.
It is also worth considering how frequently you will use the van. Someone who travels regularly may place considerable value on having a comfortable and familiar space wherever they go. Someone who only takes a few short trips each year may find that a simpler camping setup makes more financial sense.
For me, the most important measure of success would be whether the finished space makes travel and everyday living more comfortable without creating unnecessary financial pressure.
Frequently Asked Questions
How much does it really cost to convert a cargo van?
The cost depends on the vehicle, materials, equipment, and amount of work you complete yourself. A basic DIY build may cost a few thousand dollars beyond the vehicle purchase, while a more elaborate conversion with substantial electrical capacity, heating, plumbing, cabinetry, and premium finishes can cost many thousands more.
For the $5,000 van discussed in this article, the sample budget suggests a combined purchase and conversion cost of approximately $8,800 to $20,500 or more. This is an illustrative planning range rather than a guaranteed price. Major repairs, professional labor, and high-end equipment can increase it further.
How long does a DIY van conversion take?
A straightforward conversion may take several weeks of focused work, while a detailed build completed around a full-time job can take several months or longer. The timeline depends on experience, design complexity, material availability, and whether you need to learn new skills along the way.
Electrical work, cabinetry, plumbing, and unexpected repairs can take longer than anticipated.
Do I need experience to build a van?
You do not need to be an experienced carpenter to begin planning a DIY conversion. Many tasks, such as measuring, painting, organizing storage, and installing some simple finishes, can be learned with careful research.
However, complex electrical systems, fuel-burning heaters, gas installations, and structural modifications require appropriate knowledge. Hire a qualified professional when a task exceeds your skills, and follow the manufacturer’s instructions and relevant safety requirements.
What is the most expensive part of a van conversion?
The electrical system is often one of the largest individual expenses, particularly when the build includes lithium batteries, solar panels, an inverter, and equipment for charging from the vehicle’s alternator.
Heating, cooling, plumbing, and cabinetry can also consume a substantial part of the budget. The most expensive category varies depending on the level of comfort and independence you want.
Is it possible to live in a cargo van full-time?
Yes, a suitably equipped cargo van can support full-time living, provided the vehicle, facilities, and arrangements suit your needs. The important considerations include sleeping comfort, ventilation, water, electricity, food storage, hygiene, waste disposal, security, and access to legal overnight parking.
Full-time van living also requires planning for weather, vehicle maintenance, and periods when the van needs repairs.
Is it cheaper to convert a van yourself or buy a finished campervan?
Building your own conversion can be less expensive if you choose economical materials, complete much of the labor yourself, and avoid costly mistakes. It also gives you more control over the layout and features.
Buying a finished campervan can save time and provide professionally installed systems, but the upfront price may be higher. Compare vehicles with similar mechanical condition and equipment rather than comparing purchase prices alone.
What is the most important feature in a luxury van conversion?
There is no single feature that matters equally to everyone. A comfortable bed, reliable ventilation, a well-planned electrical system, or a functional kitchen may be the most valuable upgrade depending on how you use the van.
The best investment is one that solves a real daily problem. Prioritize safe, dependable essential systems before spending heavily on decorative features.
Can a converted cargo van have a shower and hot water?
Yes, a van can be fitted with a compact shower and water-heating system, but the installation requires careful planning. You need enough water storage, suitable plumbing, drainage, moisture control, and a safe heating method.
An indoor shower also takes up valuable space and can increase weight. Some builders prefer an outdoor shower or a simpler washing arrangement to save room and reduce complexity.
Is it legal to live in a converted van?
The rules depend on where the vehicle is registered and where you intend to park or sleep. Vehicle classification, registration, insurance, parking restrictions, and overnight camping rules may all apply.
Check the relevant local regulations before making assumptions about whether a conversion qualifies as a motorhome or whether overnight stays are permitted in a particular location.
Final Thoughts
Transforming a $5,000 cargo van into a comfortable tiny home is a project that rewards careful planning more than expensive materials alone.
The vehicle provides the foundation, but the quality of the finished space depends on how well you manage the hidden systems, choose your layout, control the budget, and prioritize everyday comfort.
Start with the mechanical condition of the van, resolve rust and leaks, and plan the insulation, electrical system, ventilation, and plumbing before covering the interior.
Build furniture around your daily routines, keep weight within the vehicle’s limits, and invest in the features you will genuinely use.
You do not have to complete every luxury upgrade at once. A safe, practical interior can be built in stages, allowing you to learn from each step and spread the cost over time.
Most importantly, measure the success of your conversion by how well it works in real life. A thoughtfully designed bed, reliable power, sensible storage, and good ventilation can make a much bigger difference than expensive finishes that look impressive but add little practical value.
If you want to continue preparing for life on the road, my rv living hacks: 10 things I wish I knew guide and 7 must have items for your RV guide offer additional ideas for a more comfortable setup. You can also explore my how we found free beachfront camping spots guide for ideas on finding places to enjoy once your van is ready for its next adventure.